


Building a sign-up form is a common task in web development, and the React framework provides an excellent platform to accomplish this easily. With React, you can create a functional and user-friendly sign-up form by using its features for form creation, management, and validation.
There are two approaches to handling forms in React: controlled components and uncontrolled components.
Controlled components use the React hook
useStateto manage state variables and handle form input. This gives you complete control over the form data.Uncontrolled components let the Document Object Model (DOM) handle the form data internally. This can make development easier, but you lose some control over the form data.
This guide focuses on using controlled components to build a sign-up form. It provides step-by-step instructions for setting up your React project, creating the form component, managing the form state, handling validation, and form submission.
Prerequisites
To get the most out of this guide, it is recommended to have a basic understanding of HTML, CSS, JavaScript, and some React concepts such as components, props, and state. If any of these technologies are not familiar to you, take some time to learn them before proceeding.
Setting Up the React Project
The first thing we need to do for this project is to set up our development environment. Make sure you have Node.js installed on your PC. If you don't have it yet, you can visit https://nodejs.org and download the LTS version for your operating system.
Now, let's create a new project folder and navigate to it in the terminal or command prompt. Once we're in the project folder, we'll use the following command to create a new React project:
npx create-react-app sign-up-form
The above command will create a sign-up-form directory that includes essential files and configuration for a basic React project. Then, we'll enter the following command to navigate to the new project directory:
cd sign-up-form
The next step to start the development server. We'll do this by running the following command:
npm start
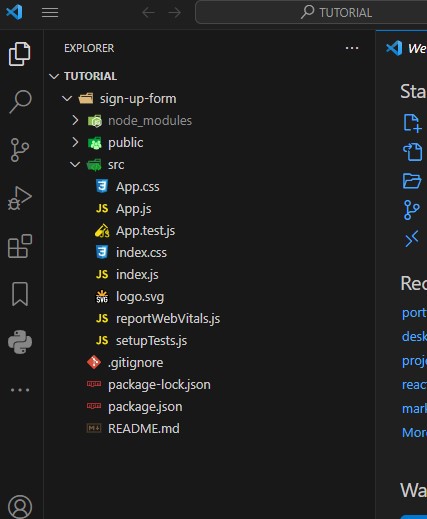
This will open a new browser tab at http://localhost:3000 for the React application. After creating the React app, your file structure looks like this:
Creating the Form Component
To create the form component, we'll start by creating a folder called components inside the src folder. Next, we'll create a file called SignUpForm.js inside the components folder.
Copy the following code snippet and paste it into the SignUpForm.js file to create the input fields for name, email, password, confirm password, newsletter, and the sign-up button:
import React from 'react';

function SignUpForm() {
  return (
    <div className='form-container'>
       <form className='form'>
            <input
                type="name"
                placeholder="Your name"
                className="input"
            />
            <input
                type="email"
                placeholder="Email address"
                className="input"
            />
            <input
                type="password"
                placeholder="Password"
                className="input"
            />
            <input
                type="password"
                placeholder="Confirm password"
                className="input"
            />

            <div className='marketing'>
                <input
                    id="allowEmail"
                    type="checkbox"
                />
                <label htmlFor="allowEmail">I want to join the newsletter</label>
            </div>
            <button className='submit'>
                Sign Up
            </button>
        </form>
    </div>
  )
}

export default SignUpForm;
The next step is to clean up the App.js file and import the SignUpForm
component into it:
import React from 'react'
import './App.css'
import SignUpForm from './components/SignUpForm';

function App() {
  return (
    <div>
      <SignUpForm />
    </div>
  );
}

export default App;
Styling the Form
To style our sign-up form, we'll start by cleaning up the App.css file and replacing its contents with the following CSS styles. These styles will make our form appealing and user-friendly.
* {
  box-sizing: border-box;
}

body {
  margin: 0;
  background-color: #1c247a;
  height: 100vh;
  font-family: 'Inter', sans-serif;
}

.form-container {
  height: 100vh;
  padding: 20px;
  display: flex;
  flex-direction: column;
  justify-content: center;
  align-items: center;
}

.form {
  background-color: white;
  padding: 50px 70px;
  border-radius: 10px;
  display: flex;
  flex-direction: column;
  align-items: center;
  box-shadow: 5px 5px 15px -1px rgba(0,0,0,0.75);
}

.input {
  width: 120%;
  margin-top: 20px;
  height: 40px;
  border-radius: 5px;
  border: 1px solid gray;
  padding: 5px;
  font-family: 'Inter', sans-serif;
}

.marketing {
  display: flex;
  margin-bottom: 20px;
  margin-top: 20px;
  align-items: center;
}

.marketing > input {
  margin-right: 10px;
}

.submit {
  width: 50%;
  padding: 10px;
  border-radius: 5px;
  color: white;
  background-color: #1c247a;
  border: none;
  cursor: pointer;
}

.messages {
  display: flex;
  justify-content: center;
}

.success {
  display: block;
  color: white;
  width: fit-content;
  height: 100px;
  padding: 5px;
}

.error {
  font-size: 12px;
  color: red;
  margin-top: 10px;
  margin-left: -20px;
  align-self: flex-start;
}
State Management in the Form
It's time to make the form interactive. We'll use the React useState hook to define the state variables and their initial values. So, let's start by importing useState from React:
import React, { useState } from 'react'
Next, we'll define the initial state as an object and set the input values to empty strings. We'll also set the joinedNewsLetter checkbox value to false.
export default function SignUpForm() {
    const [formData, setFormData] = useState({
        name: "",
        email: "",
        password: "",
        confirmPassword: "",
        joinedNewsLetter: false
    })

   // ... other code
}
The formData object will store the current values of the form inputs, while setFormData is a function that we can use to update the form data.
Handling Form Input
To handle input changes and update the states as users interact with the form, we'll assign an onChange event handler called handleChange to each input field. This event will be triggered when users make changes to the input fields.
In addition, we will give each input field a name property to distinguish the input that triggers the handleChange event. And it's a good practice to use the exact name of the name property saved in the form state.
Using the value property, we will also bind the form input fields to the state variables. This ensures that the state reflects the data a user inputs. But the checkbox inputs will have the checked property.
  <form className='form'>
                <input
                    type="name"
                    placeholder="Your name"
                    className='input'
                    name="name"
                    onChange={handleChange}
                    value={formData.name}
                />
                <input
                    type="email"
                    placeholder="Email address"
                    className='input'
                    name="email"
                    onChange={handleChange}
                    value={formData.email}

                />
                <input
                    type="password"
                    placeholder="Password"
                    className='input'
                    name="password"
                    onChange={handleChange}
                    value={formData.password}
                />
                <input
                    type="password"
                    placeholder="Confirm password"
                    className='input'
                    name="confirmPassword"
                    onChange={handleChange}
                    value={formData.confirmPassword}
                />

                <div className='marketing'>
                    <input
                        id="allowEmail"
                        type="checkbox"
                        name="joinedNewsletter"
                        onChange={handleChange}
                        checked={formData.joinedNewsletter}

                    />
                    <label htmlFor="allowEmail">I want to join the newsletter</label>
                </div>
                <button className='submit'>
                    Sign up
                </button>
 </form>
Now, let's create the handleChange function to run the event handler when triggered:
const handleChange = (event) => {
        const {name, value, type, checked} = event.target
        setFormData(prevFormData => ({
            ...prevFormData,
            [name]: type === "checkbox" ? checked : value
        }))
    }
In the above code snippet, the handleChange function receives an event as an argument, which represents the input change event. The function extracts the name, value, type, and checked properties of the form element that was interacted with.
The setFormData function is then used to update the form data with new values. It takes a callback function as an argument, which receives the previous form data as an argument (prevFormData). Inside this callback, the form data object is spread (...prevFormData), creating a new object that inherits the previous form data.
The value of the property specified by [name] is updated based on the type of input. If the input type is a checkbox, the value is set to the checked value of the checkbox. Otherwise, it is set to the value of the input field. This way, the form data is updated based on the input field's name and type, ensuring that the component state represents the most recent form input values.
Form Validation and Submission
It's time to set up the onSubmit event handler on the form tag to execute the handleSubmit function.
<form className="form" onSubmit={handleSubmit}>
   // ... other code
</form>
To handle input errors, we'll add some validation logic. This logic will ensure that no input field is left empty. If any field is not validated, an error message will be displayed when a user clicks the sign-up button. Clicking the sign up button will trigger the submit event on the form and run the handleSubmit function.
Next, let's set up the states for checking errors and submitting the form data:
 const [formData, setFormData] = useState({
        name: "",
        email: "",
        password: "",
        confirmPassword: "",
        joinedNewsLetter: false
    })
// states for errors and submission
const [error, setError] = useState(false);
const [submitted, setSubmitted] = useState(false);
Then, we'll create the handleSubmit function to handle the form submission:
const handleSubmit = (event) => {
        event.preventDefault()
        if (
          formData.name === "" ||
          formData.email === "" ||
          formData.password === "" ||
          formData.confirmPassword === ""
        ) {
          setError(true);
        } else {
          setSubmitted(true);
          setError(false);
        }
}
Inside the handleSubmit function, the event.preventDefault() prevents the default behavior of a form submission, which is to refresh the page.
The function then checks if the required fields such as name, email, password, and confirmPassword are filled. If any field is empty, it sets the error state to true. If all fields have values, it marks the form as submitted without any error.
To display an error message when any of the inputs are left empty, we'll add some logic to each input field.
<form className='form' onSubmit={handleSubmit}>
        <input
            type="name"
            placeholder="Your name"
            className='input'
            name="name"
            onChange={handleChange}
            value={formData.name}
        />
        {error && !formData.name && <span className="error">*Please enter your name</span>}

        <input
            type="email"
            placeholder="Email address"
            className='input'
            name="email"
            onChange={handleChange}
            value={formData.email}
        />
        {error && !formData.email && <span className="error">*Please enter your email</span>}

        <input
            type="password"
            placeholder="Password"
            className='input'
            name="password"
            onChange={handleChange}
            value={formData.password}
            />
        {error && !formData.password && <span className="error">*Please enter your password</span>}

        <input
            type="password"
            placeholder="Confirm password"
            className='input'
            name="confirmPassword"
            onChange={handleChange}
            value={formData.confirmPassword}
        />
        {error && !formData.confirmPassword && <span className="error">*Please confirm your password</span>}

        <div className='marketing'>
            <input
                id="allowEmail"
                type="checkbox"
                name="joinedNewsletter"
                onChange={handleChange}
                value={formData.joinedNewsletter}
            />
            <label htmlFor="allowEmail">I want to join the newsletter</label>
        </div>

        <button className='submit'>Sign Up</button>
</form>
Let's set up the state variables for the password and confirm password. Next, we'll write a conditional statement to check if the two values match. If they don't match, an error message will appear when a user tries to submit the form:
const [passwordMatch, setPasswordMatch] = useState(true);
const handleSubmit = (event) => {
        event.preventDefault()
        if (formData.name === '' || formData.email === '' || formData.password === '' || formData.confirmPassword === '') {
            setError(true);
        } else {
            setSubmitted(true);
            setError(false);
        }
        // for password match
        if (formData.password === formData.confirmPassword) {
            setPasswordMatch(true)
        } else if (formData.confirmPassword === '') {
            setError(true)
        } else {
               setPasswordMatch(false)
               setSubmitted(false)
        }
    }
To handle the confirmPassword input and display the passwordMatch error message, we will add the following line to the confirm password input:
{!passwordMatch && <span className="error">Passwords do not match!</span>}
Lastly, to show a success message when the sign-up form is submitted successfully, let's add the following code:
const successMessage = () => {
        return (
            <div className='success' style={{display: submitted ? '' : 'none'}}>
                <h1>Successfully signed up!!!</h1>
            </div>
        )
    }

return (
    <div className='form-container'>

        <div className='messages'>
            {successMessage()}
        </div>

       <form className='form' onSubmit={handleSubmit}>
           // ... other code
       </form>
    </div>
  )
If you'd like to explore the entire code for this project, simply click the CodeSandbox editor below:
Conclusion
Throughout this guide, we have covered all the essential steps needed to create a functional sign-up form, including setting up the React project, creating the form component, managing state using the useState hook, handling input changes, and form validation and submission.
While the guide focuses on the basics, you can continue to experiment and add more features to enhance the form based on your project's requirements. Happy coding !!!